⚠Toxic to cats & dogs.
Aloe Vera is poisonous if chewed or eaten —
keep it out of reach of pets and children.
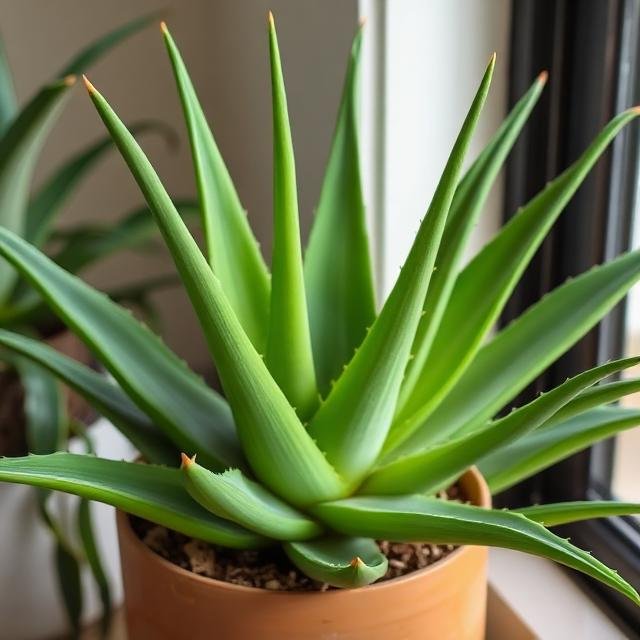
Original photo by RadixPlants — photographed locally with the owner’s permission.
Aloe Vera is one of those plants that earns its keep. Beyond being an easygoing succulent that asks for very little, the gel inside its plump leaves has been used for soothing minor burns and skin irritation for generations. It sits happily on a sunny windowsill, tolerates forgetfulness, and slowly produces little offshoots you can pot up into new plants.
Like most succulents, aloe comes from hot, dry places and stores water in its thick leaves. That single fact explains almost everything about caring for it: the danger is never that you'll forget to water it — it's that you'll water it too much.
Caring for Your Aloe Vera
Light. Aloe wants bright light and can handle direct sun, especially a sunny windowsill. In too little light it grows leggy and pale, and the leaves may flatten out and sprawl rather than standing upright. If you're moving one into strong sun after a spell indoors, do it gradually so it doesn't sunburn.
Water. Let the soil dry out completely, then water thoroughly and let all the excess drain away. In practice that's often every 2–3 weeks, and less in winter. If you're ever unsure whether to water, don't — aloe handles being too dry far better than being too wet.
Humidity. Low humidity is perfect. Normal, dry household air suits it well.
Soil and potting. Use a cactus or succulent mix, or regular potting soil with plenty of extra perlite or sand for drainage. A pot with drainage holes is essential — this is a plant that dies in soggy soil.
Feeding. Barely needed. A light feeding once or twice over the growing season is plenty.
Common Problems & Fixes
Mushy, soft, translucent leaves. Overwatering and rot — the number-one way aloe plants die. Let the soil dry fully, check the roots, and water much less. Firm, plump leaves are healthy; squishy ones are a warning.
Flat, sprawling, pale leaves. Usually not enough light. Move it somewhere sunnier and the new growth should stand up better.
Brown or red-tinged leaves. Often too much sudden direct sun (sunburn), or sometimes stress. A little reddish tint in strong light can be normal, but crispy brown means scorch.
Thin, curling leaves. The rarer thirst signal — if the soil has been bone dry a long time, give it a good drink.
Pests. Uncommon; occasionally mealybugs.
Propagating Your Aloe Vera
Aloe propagates most reliably through its pups — the small offset plants that grow around the base of a mature aloe.
When a pup is a few inches tall and has a few leaves of its own, you can separate it. Remove the plant from its pot, find where the pup connects to the parent, and gently separate it, trying to keep some roots attached to the pup. Let the separated pup sit out for a day or two so the cut area can callus over — this helps prevent rot — then pot it into a well-draining succulent mix.
Wait several days before watering a newly potted pup, then treat it like any aloe. Note that unlike some plants, aloe doesn't reliably root from a single cut leaf — pups are the dependable route.